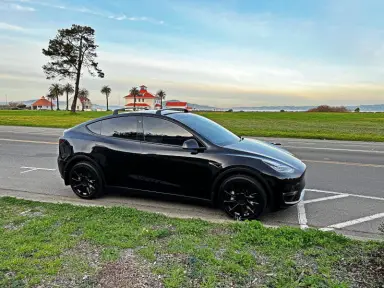
Automobile tinting transcends mere aesthetic enhancement; it represents a judicious choice laden with multifarious benefits. Initially, it serves to moderate the vehicle’s internal temperature on excessively warm days by reducing the quantity of heat entering the cabin, thereby ensuring a more agreeable journey.
In addition, vehicle tinting acts as a safeguard against the sun’s intense glare. Every motorist has experienced instances of being momentarily blinded by sunlight, which complicates maintaining concentration and can precipitate perilous situations. Tinting effectively addresses this issue by limiting the influx of solar rays, subsequently enhancing safety and visibility.
Beyond the utilitarian benefits, superior-quality automobile tinting augments the overall visual appeal of the vehicle. Moreover, it offers an element of privacy by preventing inquisitive onlookers from peering into your automobile.
Continue perusing our article to further your understanding of the intricacies of automobile tinting.
Key Takeaways:
- Car tinting, besides offering aesthetic enhancement, provides benefits such as heat reduction, glare protection, increased privacy, and improved vehicle appearance.
- The cost of professional car window tinting varies depending on vehicle type and other factors, with prices ranging from around $350 for sedans to up to $1,500 for vans/minivans.
- Legal restrictions on car window tinting vary by state, affecting aspects such as allowable tint percentage and which windows can be tinted.
- Applying tinting film is a meticulous process, requiring careful cleaning, accurate cutting, proper positioning, and thorough flattening to ensure a successful application.
What is the financial outlay for tinting your vehicle's windows?
Undoubtedly, the most rational and prudent course of action is to entrust your automobile to seasoned professionals. These experts are proficient in all aspects of tinting and will execute the task with efficiency and precision: you merely drive your vehicle into the facility, and in a few hours, you may retrieve it with tinted windows.
Nevertheless, this service incurs a specific monetary expenditure. If one seeks superior results from experienced professionals, preparation for a substantial financial commitment is requisite.
The expense of tinting varies for each category of vehicle and is determined individually, contingent upon the number of windows, their location, and shape. To provide a general estimate:
4-Door Cars (Sedan, Hatchback, Wagon)
On average, the expense incurred for tinting a single window of such a vehicle is $70; therefore, for a complete set of five windows (two side front, two side rear, one rear window, excluding the windshield), the total expenditure would be approximately $350.
Naturally, opting to tint fewer windows will proportionally reduce the cost.
Coupes
A premium is charged for coupes possessing steep rear or curved windows.
Such windows necessitate additional skill to tint, consequently elevating the service cost.
The average expense for tinting a two-door car (comprising five windows) is estimated at $450.
Trucks
The cost fluctuates depending on the specific configuration of your truck, including the number of doors and windows, thus affecting the tinting price.
For a standard two-door pickup configuration, one should be prepared to allocate between $350-400.
SUVs
Large SUVs necessitate extra care and effort to ensure the tinting process is conducted appropriately. Given their larger windows, the cost for a comprehensive SUV tint can ascend to $900.
Van / Minivan It is imperative to note that an increase in the number of windows correlates to an increase in cost. Depending on the dimensions, window tinting for a passenger van can reach up to $1,500.
What Affects Windows Tinting Cost?

It is imperative to note that the cost of tinting is influenced by the model of your vehicle and various associated factors. These include:
- The type of film utilized. The composition, manufacturer, and light transmission capacity all significantly impact the final cost of tinting. It is not advisable to economize on the tinting film, as it directly affects visibility and consequently, safety on the road;
The chosen workshop. Different professionals value their work distinctively. For identical services, two specialists may charge divergent rates, contingent on their experience and expertise. However, a higher cost does not invariably guarantee superior quality, just as a lower cost is not indicative of substandard work;
- The structure and variety of windows in your vehicle. The design of your vehicle’s windows can alter the final tinting cost. If the glass is sectioned or of an unconventional shape, additional effort and time are necessitated, thereby increasing the cost. Opting to tint the windows independently will result in significant financial savings. In such instances, expenditures are confined to materials and tinting film, potentially amounting to approximately $100.
However, if one chooses to undertake this task personally, patience is requisite – it is a meticulous and protracted process that demands concentration and specific skills. Achieving the desired outcome may necessitate several attempts.
Is it legal to tint your vehicle`s windows?

Prior to initiating the tinting process, it is imperative to ascertain that one is in compliance with the prevailing regulations of the residing state. Each state articulates distinct stipulations pertaining to window tinting: some delineate a maximum allowable percentage, others proscribe it entirely, whilst several impose no restrictions.
However, a consensus among nearly all states is the prohibition of windshield tinting, attributing to its substantial impact on visibility. Ensuring adherence to the law is paramount.
How does one select an appropriate window tint?
In the event of deciding to tint your vehicle, a variety of films are at your disposal. Several factors warrant consideration when selecting a product:
- Light Transmission Capacity. The fundamental purpose of tinting film is to obstruct the penetration of solar rays into the vehicle’s interior, with each film possessing varying efficacy.
Every film is characterized by its level of light transmission, where 100% denotes maximum transparency, and 0% represents the utmost opacity. Discerning the requisite film is vital. It is essential that the film preserves visibility; unobstructed view of the roadway is imperative. Trial application on the windows and verification of clear peripheral visibility are advised. Consideration of diverse driving conditions, including nocturnal, inclement weather, and fog, is essential.
Subsequently, if daytime visibility is compromised with a particular film, it portends potential hazards, given that diminished visibility invariably affects reaction time to evolving scenarios.
Opt for a light transmission level that amalgamates solar protection without compromising safety.
- Manufacturer and Price. It is advisable to eschew the least expensive options. Inferior films not only compromise visibility but also exhibit a propensity to fade, peel, and exhibit vulnerability during application.
Striving for a balance between cost and quality is recommended. Additionally, seeking counsel from acquaintances or individuals with expertise and perusing reviews will be beneficial.
How do you tint your vehicle's windows?
Window tinting for vehicles is a nuanced procedure. Several factors must be carefully considered to ensure a satisfactory outcome. However, there is no need for apprehension; perusing this article will equip you with the knowledge to execute every step correctly.
What do you need to tint your windows?
- Window cleaner;
- Microfiber cloth;
- Blade for cleaning windows;
- Sprayer (pulverizer);
- Soap solution;
- The blade is a small but sharp knife;
- Toning film;
- Plastic spatula;
- Heat gun.
Clean the Vehicle's Windows

Before commencing the tinting process, it is prudent to meticulously cleanse the vehicle's windows. Eliminate all remnants of dirt, subsequently utilize a specialized window cleaner and a microfiber cloth to eradicate any lingering contaminants from the glass surface. Finally, rinse and buff the windows until pristine clarity is achieved.
Remove Any Preexisting Tint Film
If your vehicle is already equipped with tint, removing the preexisting film is imperative. Applying a new layer over the old compromises the final outcome and jeopardizes adherence.
In removing the old film, two predominant methodologies are available:
- Utilize a high-power hair dryer to warm the film. Subsequently, commence peeling the tint film from the edges – it should detach with relative ease. Refrain from concentrating on one area excessively; the integrity of the glass may be compromised. Ensure even heating across the entire glass surface;
- Alternatively, employ a blade as an effective tool in removing the old tint film. Specialized glass-cleaning instruments are available – utilize the blade gently as though it were a scraper, applying mild pressure to avoid scratching the glass.
Irrespective of the method employed, adhesive residue may persist on the glass. Eradicating this is crucial. While a metal scraper is a feasible option, caution is advised to avoid damaging the glass.
For a more reliable and straightforward approach, chemical solutions are advantageous. Apply anti-silicone or carburetor cleaner to the glass – allow it to sit momentarily, then cleanse the window. These agents effectively break down the adhesive, allowing for effortless removal.
Caution is advised as these chemical agents can emit strong odors and may be toxic! Ensure that work is conducted in well-ventilated areas, with strict adherence to safety guidelines.
Prepare the Tint Film
Examine the film. It comprises a dark tint layer and a protective transparent layer, akin to a sticker.
Determine which side is the protective layer. This side should be facing you during application.
Identifying this layer is straightforward: simply lift the film’s edge with a blade.
The film will separate into dark and transparent layers. The transparent layer should be your focus.
Prepare a Soap Solution
Prepare a soap solution. Fill a container with water and add 5-6 drops of liquid soap or shampoo, adjusting the quantity based on the container’s size.
Mix the components thoroughly. Transfer the solution into a spray bottle for convenience during application.
Cut the Desired Shape from the Tint Film
Before starting, it is essential to note that the tint film will be applied to the interior of the glass, but the fitting and trimming are conducted on the exterior.
Therefore, the application of the film will be in a mirrored fashion.
With this in mind, proceed to the tinting process.
Apply a Soap Solution to the Exterior of the Window
Proper surface preparation is vital before applying tint to the vehicle’s window. Start by applying a soap solution to the window’s exterior.
This step is fundamental for achieving optimal adhesion and preventing air bubbles, resulting in a flawless and desirable finish.
Place the Tint Film on the Glass and Smooth it with a Plastic Spatula or Card

Remember the previous instruction: Ensure that the transparent layer of the tinting film is facing you! Failure to do this will necessitate a redo.
Use a Blade to Trim the Tint to the Shape of the Glass
 Employ a blade to remove excess portions of the tint film. Trim the film to match the shape of the glass, but leave a 1” margin on every side.
Adjust the Trimmed Film to the Shape of the Glass
- Move the film 1 inch towards the left edge. The film should align with the freshly trimmed edge, ensuring adequate coverage for all window edges, including the portion concealed by the seal;
- Trim the right edge, then recenter the tint, leaving a 1/2 inch excess on both sides;
- Lower the film by an inch so that the bottom edge is below the window. This section will ultimately overlap the door, improving light sealing.
- Press it down, then readjust with the spatula. Repeat this process for the top and bottom edges;
- Lower the window by a half-inch, using the top of the window as a guide. Trim the film accordingly. Once complete, center the film, leaving a 1/2" margin on all sides;
- Cut away excess film in the window corners, rounding them to avoid interference during closure.
Clean the Interior of the Window Glass

Once more, ensure that the interior of the glass is immaculately clean – it should be free of dirt, marks, or debris. Apply a generous amount of soapy solution. Regarding water, more is invariably better.
Remove the Protective Transparent Layer from the Tinting Film

Detach the transparent layer from the obscured one beneath. Exercise caution! The adhesive is situated beneath the protective layer.
Upon the detachment of the transparent layer, there exists a significant risk that any contact with the adhesive surface might impair the film. Even a minor misalignment with the film’s edge could induce damage. Hence, remain vigilant and meticulous.
After the removal of the protective layer, promptly moisten the adhesive surface with a soapy solution. This action will inhibit the adherence of dirt and particulates.
Affix the Tinting Film to the Interior Surface of the Glass

Position the film with the adhesive side against the interior glass. Ensure it adheres uniformly on all sides, eliminating any gaps. Exercise patience as, due to the moisture between the film and the glass, the adhesive will not set rapidly, allowing sufficient time for adjustment. Maintain composure and ascertain proper alignment from all sides.
Important consideration: Reserve a margin of several millimeters at the top. Attaching the film directly to the upper edge could result in it adhering to the upper seal during utilization, leading to damage and detachment. Therefore, allocate a few millimeters of clearance at the top to preserve the film’s integrity during usage.
Smooth the Tinting Film on the Glass and Eliminate Excess Moisture

Once the film is affixed uniformly to the glass, without any discrepancies, and you are satisfied with its appearance, proceed to the pivotal step: expelling the residual moisture from beneath the film.
Given the substantial moisture between the glass and the film, it is imperative to remove the excess water. Utilize a plastic spatula or a card to extricate the water from underneath the film.
Maneuver the spatula downwards and laterally, extracting the water from beneath the film. Neglecting this step will result in the formation of air bubbles after the water evaporates, detracting from the vehicle’s aesthetic appeal.
Consequently, verify the complete removal of water from beneath the film. Inspect from diverse perspectives and illuminate the glass – there should be no remnants of water or air bubbles.
Replicate these Procedures for All Windows
To attain optimal and satisfactory results, it is essential to meticulously and consistently replicate all the aforementioned procedures on every other window of the vehicle. If executed with precision, the final outcome will exceed your expectations.


Reviewed by Alex Ross
Content Editor, responsible for maintaining the quality and accuracy of the information presented on our blog.
Same articles

Understanding Vehicle Inspection and Verification Services: Why They Matter for Every Driver
GuidesVehicle inspection and verification services are an essential but often overlooked part of keeping roads safe and cars legally compliant. Most people only think about inspections when it’s...
KLIFEX Brand Overview: High-Quality Automotive Repair Kits for Affordable Repairs
GuidesThe automotive aftermarket has long needed solutions that combine reliability, durability, and affordability. Many car enthusiasts and services are looking for a way...
Fast, Reliable Vehicle Emissions & Inspection Services Made Simple
GuidesFast, reliable emissions and inspection services are essential for keeping vehicles road-ready, compliant with environmental regulations, and safe for daily driving. If you’re looking for quick...